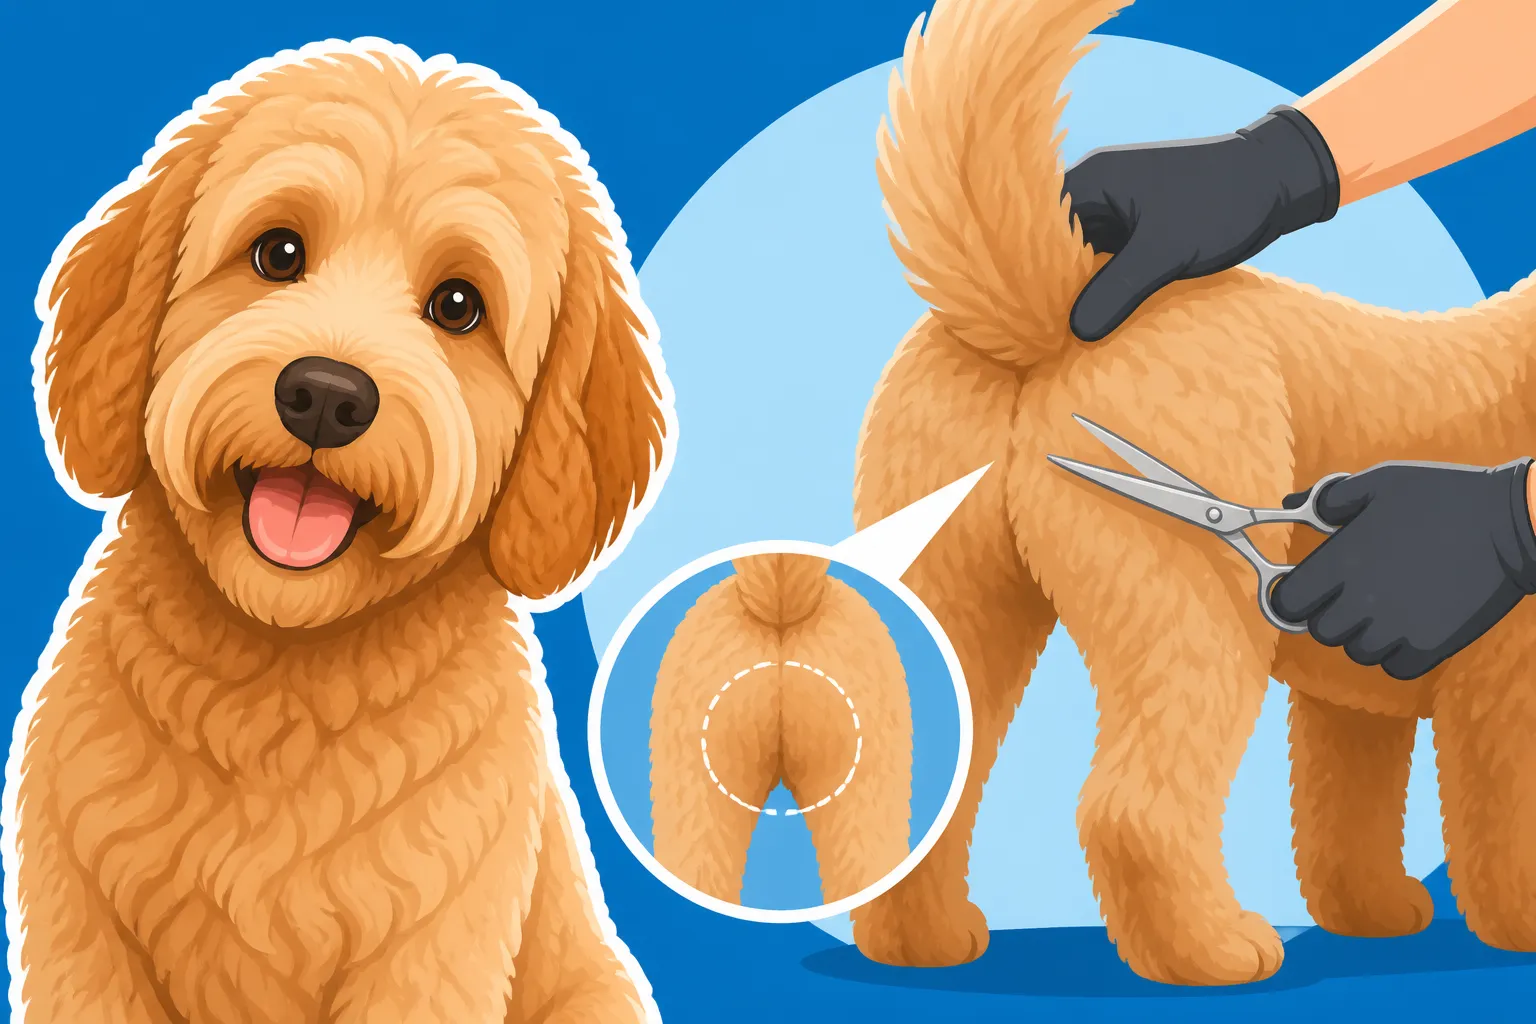
Trimming Around a Labradoodle’s Rear
If you're a Labradoodle parent, you know the struggle: keeping that beautiful, fluffy rear end clean and sanitary. It's not just about aesthetics; a dirty or matted rear can lead to serious hygiene issues, discomfort, and even health problems for your beloved companion. This guide is here to walk you through exactly how to trim around your Labradoodle's rear, ensuring they stay happy, healthy, and smelling fresh, without the anxiety of a trip to the professional groomer for a quick sanitary trim.
Why a Labradoodle's Rear Area Needs Regular Trimming
Let's face it, Labradoodles are gorgeous dogs, but their wonderful coats come with a bit of maintenance, especially around their nether regions. Many owners underestimate how quickly hair can grow and tangle in this sensitive spot, leading to a host of unpleasant problems. It’s not just about "poo-dangles," though that's certainly a major motivator for most of us!
Preventing Hygiene Nightmares and Matting
The hair around a Labradoodle's rear, especially their "furnishings" (the longer hair that often defines their doodle look), can get quite long and dense. This long hair creates a perfect trap for fecal matter, urine, and other debris. Imagine going about your day with sticky messes clinging to you – it's not pleasant for us, and it's certainly not for our dogs. Beyond the obvious yuck factor, this trapped matter can lead to skin irritation, infections, and a constant unpleasant odor.
Furthermore, this area is a prime candidate for matting. Mats are painful tangles of hair that pull on the skin, causing discomfort and potentially skin infections underneath. When the hair around the rear and tail becomes matted, it can restrict movement and make defecation difficult and painful. It's a vicious cycle: mess leads to mats, which leads to more mess and more discomfort. Regular trimming is the most effective way to break this cycle, keeping the area clear and easy to clean. You might be surprised to learn that Mats on a Labradoodle's Rear and Tail are among the most common problems groomers see.
Ensuring Comfort and Health for Your Labradoodle
Beyond the immediate issues of mess and matting, an untrimmed rear can significantly impact your Labradoodle's overall comfort and health. When hair constantly rubs and irritates the delicate skin around the anus and vulva/penis, it can cause chronic inflammation. This can lead to your dog scooting, licking excessively, and generally feeling itchy and miserable. In some cases, impacted anal glands can also be exacerbated by excessive hair, as the hair can interfere with natural expression.
A clean, clear rear allows for proper airflow, reducing the risk of moisture trapping and subsequent yeast or bacterial infections, particularly in females. It also makes it much easier for you to visually inspect the area for any abnormalities, such as rashes, parasites, or changes in stool consistency, which are crucial indicators of your dog's health. Think of it as preventative care; a small trim can save you a lot of heartache and vet bills down the line. It's a critical part of their routine care, much like understanding The Three Labradoodle Coats: Hair, Fleece and Wool and their specific grooming needs.
Gathering Your Tools and Preparing Your Labradoodle
Before you dive into trimming, it's essential to have the right tools on hand and to ensure your Labradoodle is as prepared and relaxed as possible. Rushing into it with the wrong equipment or a stressed dog is a recipe for disaster, and nobody wants an accidental nick in such a sensitive area.
Essential Grooming Tools for a Sanitary Trim
You don't need a professional grooming setup, but a few key items will make this job much safer and easier.
- Safety Scissors or Small Clippers: This is your primary tool.
- Safety Scissors: Look for blunt-nosed grooming scissors. These are fantastic for beginners as the rounded tips minimize the risk of accidental pokes or cuts. They give you good control for small, precise snips. You can find excellent blunt-nosed scissors on Amazon.
- Small, Quiet Clippers: A small, cordless trimmer, often called a "finishing trimmer" or "sanitary trimmer," can be incredibly effective, especially if your dog tolerates the sound and vibration. These are designed for delicate areas and usually come with a very fine blade (e.g., a #10 or #15 blade). The key is "quiet" – a loud, buzzing clipper can scare a dog.
- Fine-Toothed Metal Comb: Essential for separating the hair and checking your work. A good quality greyhound comb is perfect for this.
- Slicker Brush: To brush out any tangles before you start. Remember to Brushing a Labradoodle to the Skin, Not the Surface to ensure all mats are addressed.
- Grooming Wipes or Damp Cloth: For pre-cleaning and wiping away loose hair.
- Treats: Lots and lots of high-value treats! These are crucial for keeping your dog happy and cooperative.
- Non-Slip Mat: If you're working on a table or counter, a non-slip mat will provide stability and confidence for your dog.
| Tool Type | Best Use Case | Key Feature |
|---|---|---|
| Blunt-Nose Scissors | Beginners, small adjustments, nervous dogs | Safety tips, silent |
| Small Trimmer/Clipper | Experienced users, quicker trims, dense coats | Precise cut, efficiency |
| Fine-Toothed Comb | Detangling, checking for mats, lifting hair | Thoroughness, accuracy |
| Slicker Brush | Initial detangling, removing loose fur | Pre-trim prep |
| Grooming Wipes | Pre-cleaning, post-trim cleanup | Convenience, hygiene |
| High-Value Treats | Positive reinforcement, distraction | Motivation, cooperation |
Preparing Your Dog for a Stress-Free Experience
Preparation is key to a successful and stress-free trimming session for both you and your Labradoodle. A calm dog is a safe dog.
First, ensure your Labradoodle is clean and dry. Trying to trim dirty or damp hair is almost impossible, and dulls your tools quickly. If they've just come in from a rainy walk, make sure they are thoroughly dry. A good bath and blow-dry beforehand (if they tolerate it) will make the hair much easier to work with. Remember the importance of Drying a Labradoodle to the Skin After a Bath to prevent matting.
Next, brush out any tangles or mats in the area you plan to trim. You cannot cut through mats safely with scissors, and clippers will snag and pull, causing pain. Use your slicker brush and then follow up with your metal comb to ensure the hair is completely free of knots. Pay close attention to Mats in a Labradoodle's Armpits and around the sanitary area, as these are common spots. If you encounter a truly stubborn mat, refer to strategies for Splitting a Mat on a Labradoodle Before It Tightens rather than trying to cut it out blind.
Finally, create a calm environment. Choose a quiet time when there are no distractions. Speak to your dog in a soothing voice. Offer them a few treats just for standing or lying still while you show them the tools. If your dog is particularly anxious, start with very short sessions, gradually increasing the time. You might even consider having another person gently hold or distract your dog with treats while you work, especially if this is their first time. Consistency and positive reinforcement are your best friends here. You want this to be a positive association, not a dreaded chore.
Step-by-Step Guide to Trimming Your Labradoodle's Rear
Alright, it's showtime! With your tools ready and your Labradoodle prepped, let's get down to the actual trimming. Remember to take your time, prioritize safety, and offer plenty of praise and treats.
Positioning Your Labradoodle Safely
Getting your dog into a comfortable and secure position is paramount. This isn't just for your ease; it's vital for their safety.
- For smaller or more compliant Labradoodles: You can often have them stand on a non-slip surface, like a sturdy table with a bathmat or a dedicated grooming table. This brings them up to a comfortable working height for you, saving your back. Gently hold their lead or have someone else hold it to keep them still.
- For larger or wigglier Labradoodles: Sometimes, having them lie on their side can be easier. A comfy dog bed or a blanket on the floor can make this more appealing for them. You might need to gently hold one of their rear legs to keep it extended, giving you clear access to the area. Another option is to have them stand, and you lift their tail gently upwards and slightly over their back, exposing the area beneath.
- Always ensure good lighting: You need to see exactly what you're doing to avoid accidents.
Once they're in position, give them a treat and reassure them. Gently lift their tail straight up and hold it out of the way. This opens up the area you need to work on.
The Actual Trim: Technique and Caution
Now for the delicate part. Whether you're using scissors or clippers, the principle is the same: always work away from the skin, never cut blind, and always err on the side of caution.
Using Clippers (Recommended for Efficiency and Safety with Practice)
- Start with a clean, dry, and brushed area. This cannot be stressed enough. Clippers will snag on dirty or matted hair, causing pain.
- Hold the skin taut. This is crucial for preventing nicks, especially on loose skin. Use your free hand to gently pull the skin around the anus flat and smooth.
- Always point the blade away from the anus. Imagine a small circle around the anus – you want to clear the hair within and around that circle.
- Shave in the direction of hair growth first, then against it for a closer cut. For a sanitary trim, you'll likely want a fairly close cut. Start by going with the grain of the hair, which is generally safer and less likely to cause irritation. Then, if your dog tolerates it and you need a closer trim, go against the grain.
- Work slowly and in small sections. Don't try to do it all at once. Take a few passes, check your work, give a treat, then continue. Focus on clearing the hair immediately around the anus and extending outwards about an inch or two, creating a clean "oval" or "circle" where no hair can collect stool.
- Be extra cautious around the vulva (females) or penis (males). These areas are extremely delicate. For females, ensure any long hair that might wick urine is carefully trimmed away. For males, trim the hair around the sheath to prevent urine staining. Again, hold the skin taut and always direct the clippers away from these sensitive parts.
- Don't forget the underside of the tail base. This area can also collect mess and mat easily.
Using Blunt-Nose Scissors (Great for Nervous Dogs or Fine Adjustments)
- Again, start with a clean, dry, and brushed area.
- Lift the tail. Hold it up and out of the way to expose the entire region.
- Use your comb to lift the hair away from the skin. This is incredibly important. You should never, ever cut hair that is pressed flat against the skin with scissors, as you risk cutting the skin. Lift the hair with the comb, creating a "buffer" between the skin and your scissors.
- Only snip the ends of the hair that extend past the comb. Cut parallel to the skin, but always with the comb acting as a guard.
- Work in small increments. "Snip, snip, comb, snip, snip, comb." This methodical approach ensures you don't take too much off at once and maintain safety.
- Focus on clearing the immediate area around the anus. You want about an inch or two of short hair around this opening. Extend the trim slightly down the back of the thighs and up the underside of the tail to create a tidy, mess-free zone.
- Be mindful of the tail's natural curl and movement. The goal is to prevent any hair from coming into contact with waste.
- Periodically step back and assess your work. You want an even, clean trim that won't interfere with their bodily functions.
Safety Reminders for Both Methods:
- Never rush.
- Always have good lighting.
- Keep talking to your dog in a calm, reassuring voice.
- Give frequent treats and praise.
- If your dog becomes agitated, stop, take a break, and try again later. It’s better to have a slightly untidy trim than a traumatized dog or, worse, an injury.
- Always point scissors or clippers away from your dog's body when moving them around.
Once you're done, wipe the area with a damp cloth or grooming wipe to remove any loose hairs. Give your Labradoodle a well-deserved final treat and a big cuddle!
Maintaining a Clean Rear Between Trims
Trimming is a crucial step, but it's not a one-and-done solution. Ongoing maintenance between full trims is essential for keeping your Labradoodle's rear hygienic and preventing new issues from cropping up. Think of it as part of their regular What a Labradoodle Needs Daily care routine.
Regular Brushing and Spot Cleaning
Even with a fresh sanitary trim, your Labradoodle's coat is always growing, and daily life brings daily messes.
- Daily Brushing: Make it a habit to quickly brush the hair around your Labradoodle's rear, inner thighs, and the underside of their tail. This only takes a minute or two but can prevent small tangles from becoming painful mats. A good quality slicker brush and a fine-toothed comb are your best friends here. This helps prevent Mats Behind a Labradoodle's Ears as well as in other areas.
- Spot Cleaning: After every potty break, especially if your Labradoodle has soft stools or if they've been playing in muddy areas, quickly check their rear. Keep a stash of pet-friendly grooming wipes (many brands are available on Chewy or Amazon) near the door for quick clean-ups. These are excellent for removing fresh debris before it dries and hardens, which makes it much harder to remove later. For more stubborn messes, a damp cloth with a little bit of dog-safe shampoo can work wonders, followed by thorough drying.
- Addressing Soft Stools: Pay attention to your Labradoodle's digestion. If they frequently have loose stools, it will make keeping their rear clean incredibly difficult. Discuss any persistent digestive issues with your vet. Sometimes, a change in diet, perhaps to a high-quality fresh food option, can help firm up stools, making cleanup much easier.
Understanding Your Labradoodle's Coat Growth
Different Labradoodle coats grow at different rates and have varying textures, which impacts how often they'll need their rear trimmed.
- Hair Coats: Some F1 Labradoodles, particularly those leaning more towards their Labrador parentage, might have a straighter, more "hair-like" coat. This coat type might shed more, but the hair around the rear might not grow as long or dense as a fleece or wool coat. However, it can still collect debris, so regular checks are still needed.
- Fleece Coats: This is the most common and often desired Labradoodle coat, known for its soft, wavy, or curly texture. Fleece coats grow continuously and are prone to matting. You'll likely find yourself needing to trim the sanitary area every 4-6 weeks to keep it clear.
- Wool Coats: The densest and curliest Labradoodle coat, similar to a Poodle's. Wool coats require the most intensive grooming and will likely need their sanitary area trimmed just as frequently, if not more, than fleece coats, as their dense curls can trap a lot of moisture and debris.
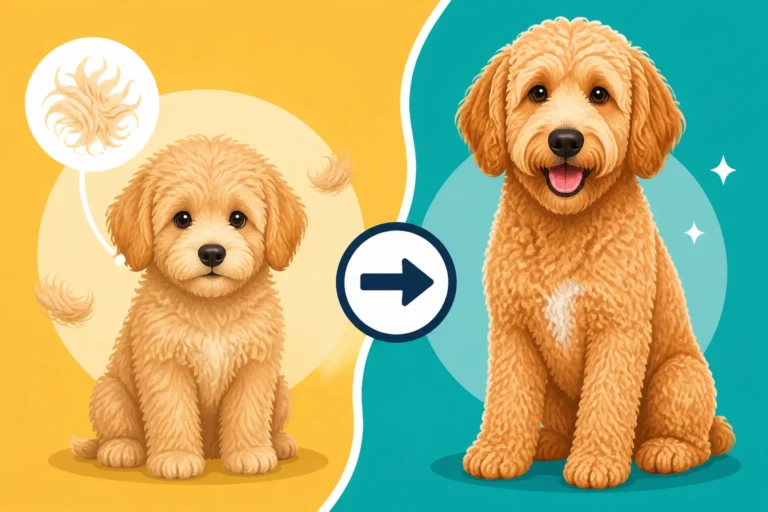
Understanding your dog's specific coat type, even considering Whether a Labradoodle's Coat Changes Texture With Age, will help you establish a realistic grooming schedule. Many owners find that setting a reminder on their phone for "sanitary trim day" every 4-6 weeks is the easiest way to stay on top of it. This proactive approach prevents the nasty surprises that can crop up when grooming is neglected.
When to Seek Professional Help
While trimming your Labradoodle's rear is absolutely something you can do at home, there are times when calling in a professional groomer is the best course of action. Don't feel bad about it – sometimes, it's just necessary!
Dealing with Extreme Matting or Behavioral Challenges
If your Labradoodle's rear area has become severely matted, attempting to cut or shave it yourself can be incredibly dangerous. Tight mats pull on the skin, making it very easy to accidentally cut your dog. In these cases, a professional groomer has the specialized tools (like professional clippers with various blade lengths) and experience to safely remove the mats without harming your dog. They are also adept at handling dogs who are in pain or very anxious.
Similarly, if your Labradoodle is extremely fearful, aggressive, or simply won't tolerate any handling of their rear, trying to force the issue at home is not safe or productive. A professional groomer might be able to work with them using different techniques, or they might recommend a veterinary groomer who can use mild sedation if absolutely necessary for the dog's safety and well-being. Sometimes, even with the best intentions, our dogs have their limits, and respecting those limits by seeking expert help is the mark of a responsible owner.
Regular Maintenance Grooming and Advanced Styling
Even if you're a pro at the sanitary trim, most Labradoodles benefit from regular, full-body professional grooming every 6-8 weeks. A professional groomer can give your Labradoodle a proper bath, thorough brush-out, and a stylish haircut that keeps their coat healthy and manageable. This often includes a comprehensive sanitary trim, making your life easier.
If you're unsure about other aspects of grooming, like Trimming the Hair Between a Labradoodle's Pads or giving them a full body clip, a professional groomer can offer advice or even teach you some tricks. They understand different coat types and can recommend the best tools and techniques for your specific Labradoodle. They can also perform checks for skin issues, ear infections, or anal gland problems that you might miss. While the cost adds up, the peace of mind and the consistently well-groomed look of your Labradoodle can be well worth the investment in their care.
Disclaimer
This article is for general informational purposes only and does not constitute professional advice. Laws, prices and regulations vary by location and change over time. Consult a qualified professional for guidance on your specific situation.